在别的语言, 如果想 Debug Runtime 的话, 得去找各种工具. 而在 Golang 中, 标准库为我们提供了一系列的工具用于 Runtime Debug, 这一系列 工具的总称叫做 pprof tool.
pprof 的 整个使用流程被分为如下三个阶段
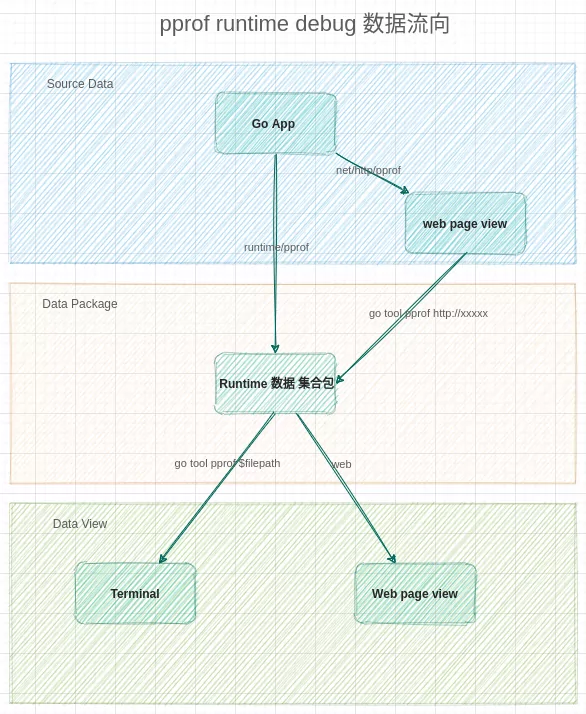
Source Data 阶段
在 Source Data 阶段, 我们可以通过 pprof 的 lib 拿到 Golang Runtime 的原始数据, 这里我们有两个途径可以选择:
runtime/pprof
使用 runtime/pprof 库直接生成 Runtime 数据集合包, 这种 方式通常用在 BenchMark 或者 test 上, 例如下面这个命令, 就可以拿到 cpu 和 mem 的 Runtime 数据包, 然后再通过 go tool pprof cpu.prof 指令就可以在 web 或者 terminal 中观察
$ go test -cpuprofile cpu.prof -memprofile mem.prof -bench .
# 观察
$ go tool pprof cpu.prof
$ go tool pprof mem.prof
net/http/pprof
使用 net/http/pprof 库, 将 runtime 数据通过 HTTP 接口的形式暴露出去.再通过类似 go tool pprof http://xxxxx 这样的指令, 获取到数据包, 并直接进入 Terminal 中观察, 这种模式用的最多, 对于运行中的服务 Debug 通常都可以使用用这种形式.例如下面这样, 首先需要在 代码中开启 , 接着使用 shell 命令, 获取 Runtime 信息, 接着就会进入 pprof 的 Terminal 终端, 然后即可使用命令查看 状态:
// main.go
package main

import (
	"net/http"
	_ "net/http/pprof"
)

func main() {
	http.ListenAndServe("0.0.0.0:6060", nil)
}
# 常用的命令
## allocs 所有分配出去的内存的 分布
$ go tool pprof http://localhost:6060/debug/pprof/allocs
## heap 堆内存分布
$ go tool pprof http://localhost:6060/debug/pprof/heap
## profile 执行时耗
$ go tool pprof http://localhost:6060/debug/pprof/profile?seconds=60 # 这个后面可以带参数来决定采集时长(默认 30s{golang 1.13}), 只有 cpu 时耗 需要采集,
## goruntime
$ go tool pprof http://localhost:6060/debug/pprof/goroutine

# 不常用
## block 和 mutex 分别是 阻塞 和 锁的竞争情况, 在解决相应问题的时候会用的到
$ go tool pprof http://localhost:6060/debug/pprof/block
$ go tool pprof http://localhost:6060/debug/pprof/mutex
Data View 阶段
这里直接跳过 Data Packages 阶段, 毕竟 数据包 没啥好讲…… 也不是给人类看的格式……
Terminal 模式
直接来到 Data View 阶段, 这里我们可以通过 数据包获取到里面的信息(使用类似 go tool pprof http://xxxx的模式从网络获取的话, 会直接进入 Terminal 模式, 而无需手动指定).
$ go tool pprof /home/kurisu/pprof/pprof.___go_build_main_go.alloc_objects.alloc_space.inuse_objects.inuse_space.004.pb.gz
File: ___go_build_main_go
Type: inuse_space
Time: Aug 11, 2020 at 1:16am (HKT)
No samples were found with the default sample value type.
Try "sample_index" command to analyze different sample values.
Entering interactive mode (type "help" for commands, "o" for options)
(pprof)
接着我们就可以 输入命令来控制 数据的展示方式. 例如 top 命令 , 这个是非常常用的命令, 更多命令 可以输入 help 来获取
(pprof) top
Showing nodes accounting for 3436.33kB, 100% of 3436.33kB total
Showing top 10 nodes out of 17
      flat  flat%   sum%        cum   cum%
 1739.95kB 50.63% 50.63%  1739.95kB 50.63%  compress/flate.(*compressor).init
 1184.27kB 34.46% 85.10%  1184.27kB 34.46%  runtime/pprof.StartCPUProfile
  512.10kB 14.90%   100%   512.10kB 14.90%  runtime/trace.Start.func1
         0     0%   100%  1739.95kB 50.63%  compress/flate.NewWriter
         0     0%   100%  1739.95kB 50.63%  compress/gzip.(*Writer).Write
         0     0%   100%  2924.23kB 85.10%  net/http.(*ServeMux).ServeHTTP
         0     0%   100%  2924.23kB 85.10%  net/http.(*conn).serve
         0     0%   100%  2924.23kB 85.10%  net/http.HandlerFunc.ServeHTTP
         0     0%   100%  2924.23kB 85.10%  net/http.serverHandler.ServeHTTP
         0     0%   100%  1739.95kB 50.63%  net/http/pprof.Index
(pprof)
Web 模式
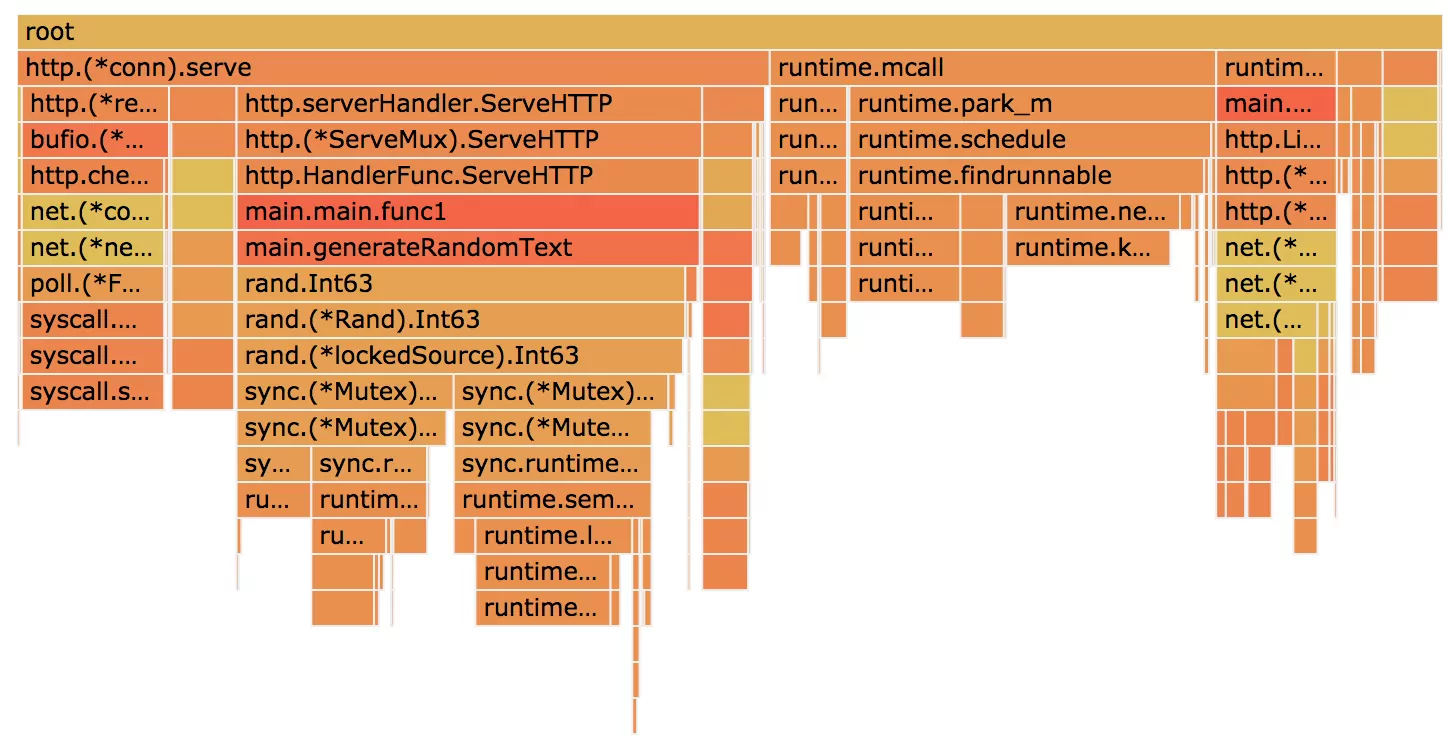
倘若 觉得 命令行看起来不舒服不直观, 我们可以输入 web 命令, 打开一个 web 窗口展示. 展示如下视图, 用这个图定位问题非常好用
(pprof) web
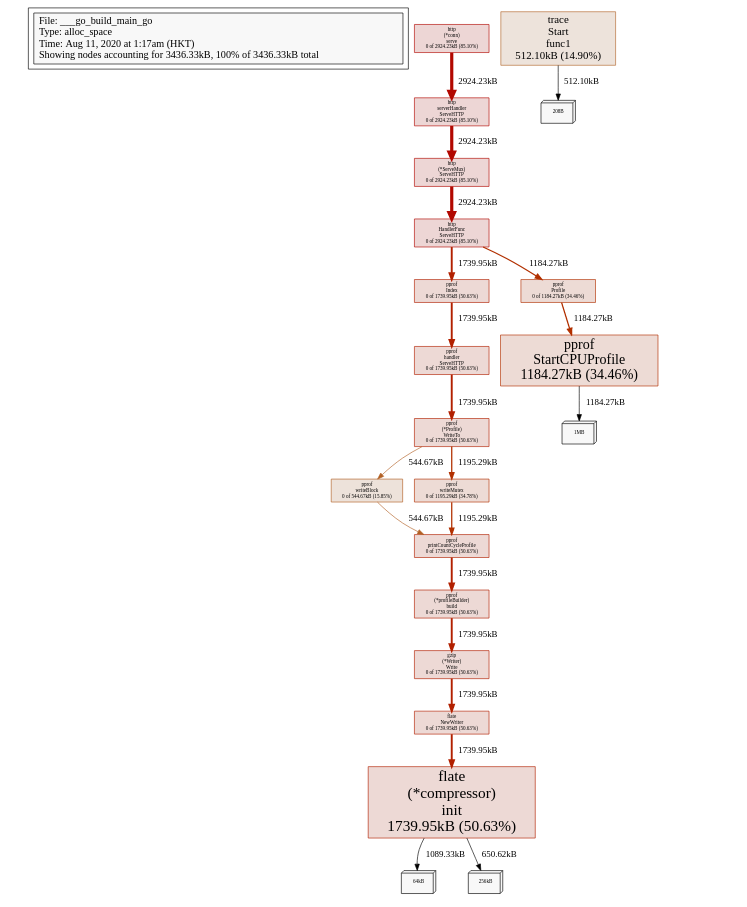
Web 模式 ++
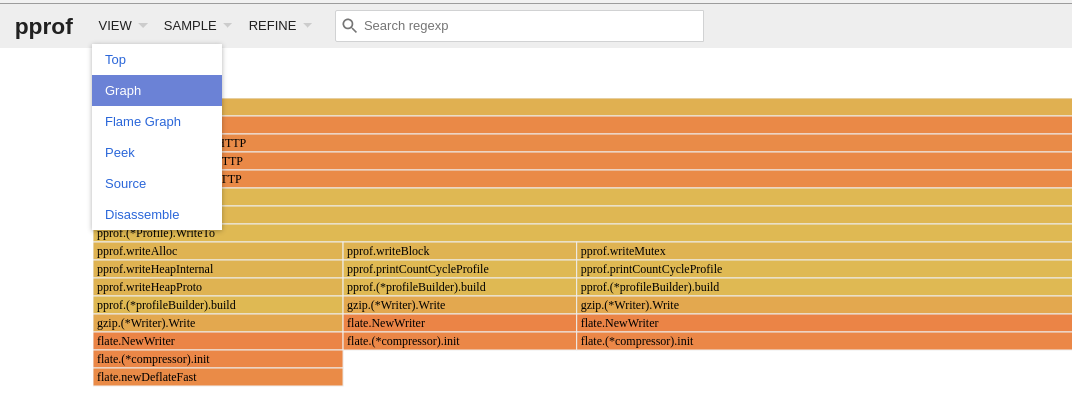
亦或者 条件允许的话, 你可以在 获取 数据包的时候, 利用 pprof 工具, 直接开启 web 服务并监听本地端口. 通过这种方式, 你可以更友好的获取全部信息.
- Top
- 调用消耗图
- 火焰图
等的数据,全部都可以在这里获取
$ go tool pprof --http=:7011 http://127.0.0.1:6060/debug/pprof/allocs
Fetching profile over HTTP from http://127.0.0.1:6060/debug/pprof/allocs
Saved profile in /home/kurisu/pprof/pprof.___go_build_main_go.alloc_objects.alloc_space.inuse_objects.inuse_space.007.pb.gz
Serving web UI on http://localhost:7011
# 或者 也可以对 data package 使用
$ go tool pprof --http=:7011 /home/kurisu/pprof/pprof.___go_build_main_go.alloc_objects.alloc_space.inuse_objects.inuse_space.004.pb.gz
以上 大致说完了 go 自带的 pprof 相关的功能, 但说到性能工具, 怎么能不说说第三方, (从鸟窝看的)
第三方工具
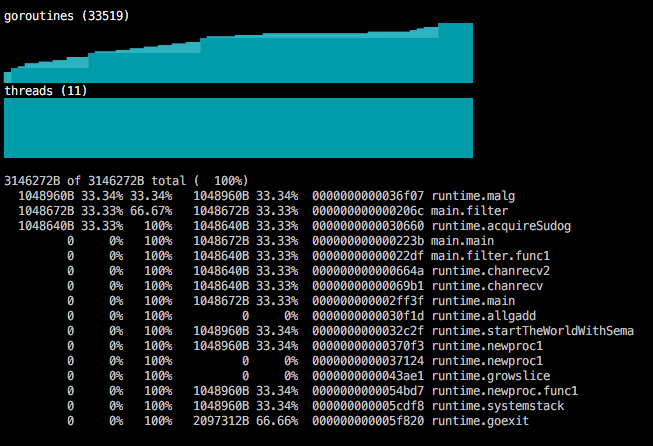
Gom
项目地址: http://github.com/rakyll/gom
效果:
debugcharts
项目地址: https://github.com/mkevac/debugcharts
效果:

看完还是要实践下, 不然很快就忘……
Ref
https://colobu.com/2017/03/02/a-short-survey-of-golang-pprof/gom.png
https://zhuanlan.zhihu.com/p/51559344
https://www.cnblogs.com/qcrao-2018/p/11832732.html
http://127.0.0.1:6060/debug/pprof/ XD
 golang